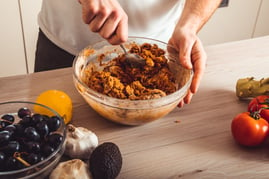
The term ‘seitan’ is of Japanese origin, coined in 1961 by George Ohsawa who was an advocate of the macrobiotic diet. Sei, meaning "made of” and tan, the first character in the Japanese word tanpaku, which means protein. However, this vegan meat alternative can be traced as far back as 1500 years ago to Buddhist monks in China. Seitan has proven itself to plant-based eaters and beyond thanks to it's chewier texture versus other soy-based meat alternatives.
Although it is made of flour, seitan is low in carbohydrates, contains almost no fat, and is an excellent source of protein. It's widely available in grocery stores in many forms, however we'll be exploring how you can make it at home -- with no fancy ingredients or machines necessary. In fact, all you need is flour, water, your hands and a little imagination! Ingredients
⦁ 2 cups unbleached white flour
⦁2 cups whole wheat flour
⦁ 3 1/2 cups of water
Optional seasonings
⦁ Garlic powder⦁ Nutritional yeast
⦁ Onion powder
⦁ Paprika
⦁ Salt
Instructions
1. Combine flour and desired dry spices in a large bowl
2. Add the water in to the flour slowly, mixing well with a spoon.
3. On a floured surface, knead the dough for five minutes until it begins to form a spongey texture.
4. Transfer the dough in to a lightly-oiled bowl, cover loosely and allow to sit for 20-30 minutes to develop gluten.
5. Once again, on a floured surface, knead an additional 10-20 times. The dough should be much more elastic than previously.
6. Transfer back to the large bowl and place it in the sink. With lukewarm, gentle water running, lift sections of the dough and squeeze firmly. This step will ensure the starch and bran separates. Continue for 2-3 minutes.
7. With the water now off, continue manipulating the dough. The water should become cloudy as the starch and bran is released from the dough.
8. Pour out the water in to a separate container. You can reserve this excess for thickening sauces, baked goods, and even as an ingredient in plant fertilizer!
9. Repeat steps 1-6 for two complete cycles of rinsing the dough.
10. By now, you should have strings of gluten emerging. This is a sign that you can apply a bit more vigor to your handling of the seitan. This is the fun part! Work the strands apart, twist them; the more you work the seitan, the more of the "pull-apart" quality that meat has will emerge when cooked.
11. Transfer your seitan to a colander and rinse, rinse, rinse! If you feel like it is too mushy, keep your water temperature on the cooler side. If it seems like it is tough, lukewarm water should mediate that.
12. Continue pulling the gluten apart under running water for 5-10 minutes. You will know the rinsing process is complete when the water is clear and your seitan is shiny, firm and elastic.
13. Separate your seitan in to 2-3 workable piles, and "tie" each individual portion in to one or two knots. This step gives the seitan that satisfying "shredding" quality.
Seitan is extremely versatile, and can be used in place of any rotisserie meats, shredded meats, and even burgers or fried "chicken". It can be baked, boiled or grilled -- the possibilities are endless! Do you have a favorite seitan recipe? Click here to submit your recipe and it may be featured on our social media for National Nutrition Month!

